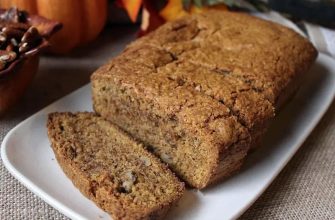
This red velvet cake is moist and flavorful and always a show stopper! If you have never made a red velvet cake from scratch, now is the time! Give this One Bowl Pink Velvet Cake a try next!
I love this cake for a number of reasons, but mostly because of the taste. It’s just darn delicious! A really good Red Velvet Cake.
What is Red Velvet Cake?
This cake has been around forever and started out with simple ingredients like cocoa, buttermilk, and vinegar.The redd color was added later, resulting in the vibrant colors we see today. It is traditionally paired with cream cheese frosting, but red velvet cake purists often prefer an ermine (what I call cake gravy) frosting.
What Does Red Velvet Cake Taste Like?
These days (in most recipes) it tastes like a chocolate cake. But it shouldn’t taste AS rich as a traditional chocolate cake because of the addition of buttermilk and vinegar, which cut into the richness of the cocoa. However, all of that depends on the quality and selection of the ingredients. You could use a special dark cocoa or apple cider vinegar or extra rich vanilla which would all impact the flavor. I recommend making your own homemade buttermilk for this recipe!
I walked the middle road with my red velvet cake recipe, using buttermilk and vinegar, but also food color. I also paired it with my favorite cream cheese frosting and think it’s all quite magical!
How do You Decorate a Red Velvet Cake?
I decorated this cake with a few simple tools.
First was a piping bag fitted with a 2A (large open round) tip. I used this tip to create the dollops around the edged of the cake. It is not essential to use a 2A tip, you can achieve a similar effect by just cutting off the tip of the piping bag. It IS important to use a piping bag to control the flow of frosting when piping the dollops.
Next is the large offset spatula. This was used to create the pattern on top of the cake where I simply pressed the tip of the spatula down into the dollop and dragged towards the center of the cake. It’s so simple and forgiving yet a really beautiful way to decorate.
Tips, Tricks, and Variations for Red Velvet Cake
You can make your cream cheese frosting in advance, just make sure it comes to room temperature before you spread it on the cake.
When cutting this cake use a long sharp knife. I like to cut cake chilled for more precise pieces, but for this cake specifically, I prefer to serve it at room temperature. At room temperature it is soft and using a sharp knife will help ensure your pieces stay together and look beautiful.
Want to turn this recipe into brownies? Add an additional egg (so 3 total) and remove the baking powder. It’s dense and fudgy red velvet brownie fabulousness!
INGREDIENTS
- 1 cup (240g) buttermilk, room temperature
- 1 tsp. McCormick vanilla
- 1 tsp. vinegar
- 1 oz red food color
- 2 cups (450g) granulated sugar
- 1 cups (224g) vegetable oil (can use olive oil)
- 2 large eggs room temperature
- 2 1/2 cups (320g) cake flour
- 1/4 cup (32g) good quality cocoa powder
- 1 1/2 tsp. baking powder
INSTRUCTIONS
- Heat oven to 350°F. Prepare three 8-inch round baking pans by spraying with baking and lining with parchment or spreading GOOP and lining with parchment.
- In a 2 cup measuring cup (or medium bowl) pour buttermilk.
- Add the vanilla, vinegar, and red food color to buttermilk and whisk to fully combine. Set aside.
- In a large bowl add sugar, oil, and eggs and whisk together by hand until it is smooth and light yellow.
- Add cake flour, cocoa, and baking powder to the sugar mixture and whisk until just combined.
- Now add the buttermilk mixture and whisk until just combined. You do not want any lumps, but I do recommend being gentle with this batter.
- Pour about 1 3/4 cup batter into each pan and bake for 22-32 minutes. When using my convection oven I will bake these at 325°F for 22 minutes. The cake is done when it does not appear wet on the top and if you press your finger gently in the center of the cake it feels firm.
- Allow to cool in the pan for about 5 minutes, then invert onto a cooling rack. Chill cakes until ready to assemble.


